How To Set Up and Manage Shopify Shipping

With online shopping rising year after year delivering your products to customers in a timely and efficient manner is one of the most important factors for customer satisfaction.
Shopify is one of the leading e-commerce platforms, and luckily makes it easier than most to set up and manage your shipping process. In this guide, we will walk you through the steps to set up and manage Shopify shipping to ensure a hassle-free experience for both you and your customers!
Setting Up Shopify Shipping

Setting up shipping settings in Shopify can be done in just a few simple steps. Follow these instructions to get started:
- Log in to your Shopify admin panel.
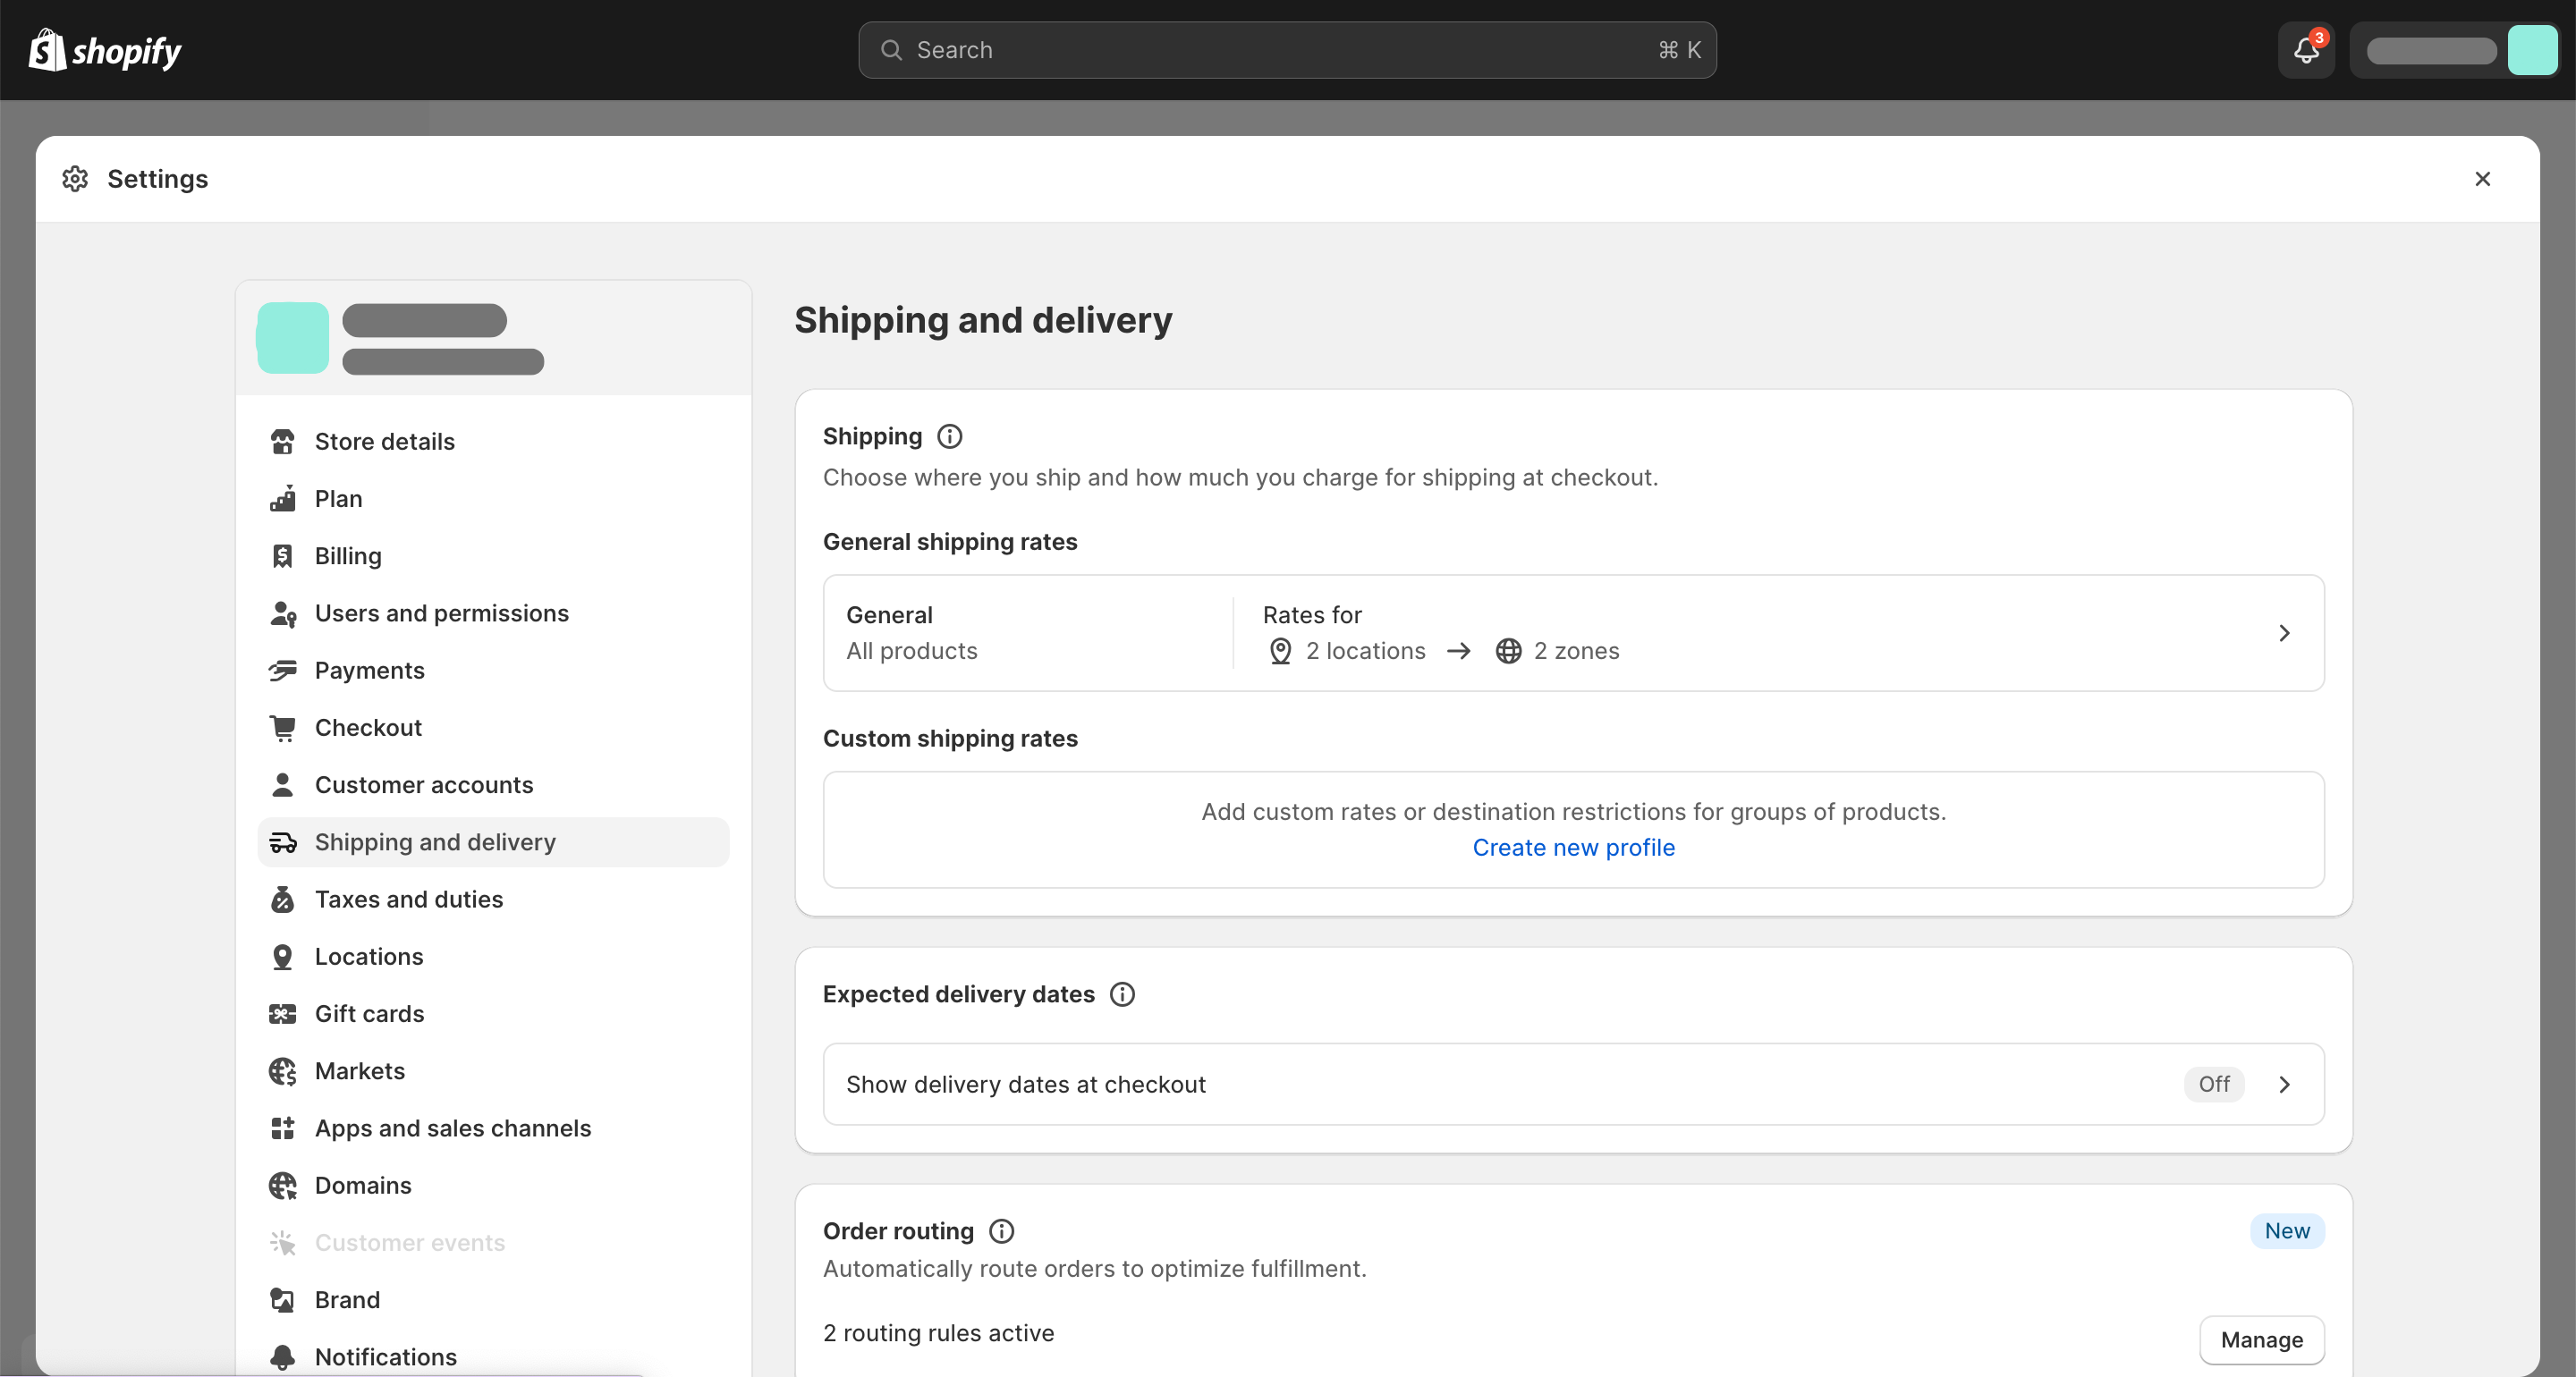
- From the left-hand menu, go to "Settings" and select "Shipping and delivery."
- Click on the "+ Add shipping zone" button to create a new shipping zone.
- Name your shipping zone and select the regions you want to include.
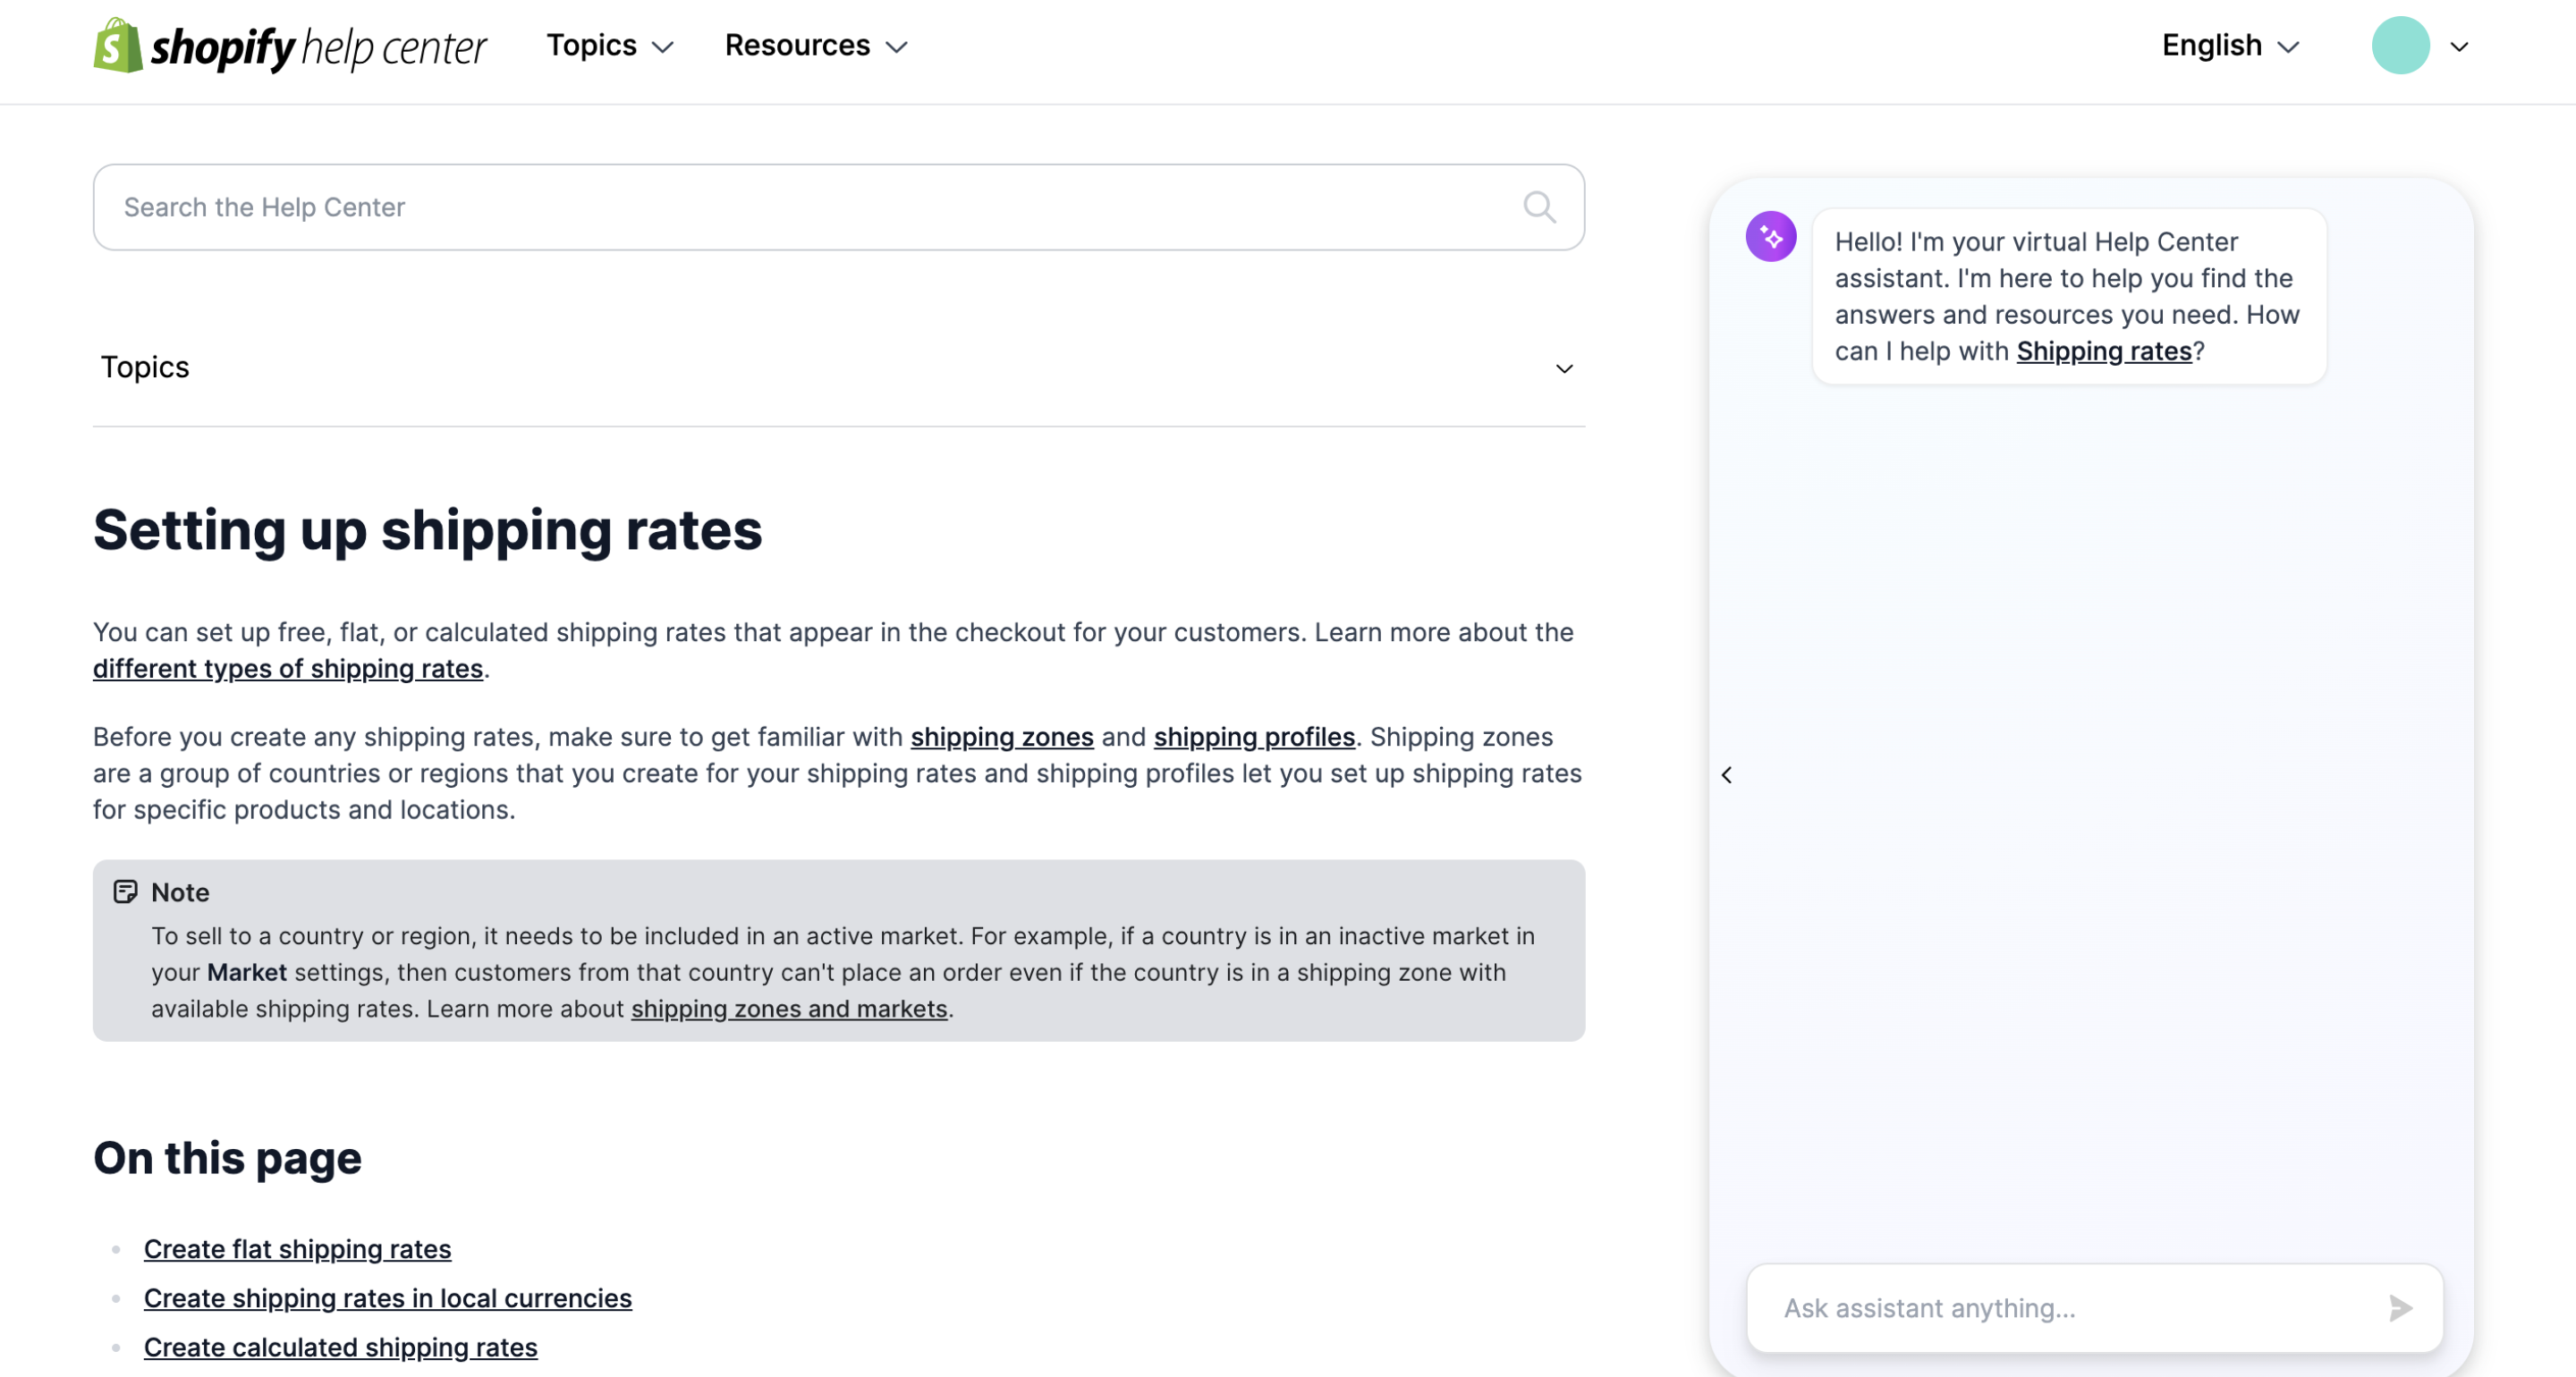
- Set up shipping rates for each region according to weight, price, or calculated rates based on your preferred courier or carrier services.
- Specify handling fees and any additional shipping rules or restrictions.
Determining Shipping Rates
Calculating shipping rates is a critical aspect of setting up Shopify shipping. Here are a few factors to consider when determining rates:
Product weight and dimensions
Check with your shipping carrier to understand how they calculate rates based on weight and package size.
Destination and origin
Take into account the distance between your location and the customer's location to estimate shipping costs accurately.
Shipping method
Different courier services offer various options (e.g., standard, expedited, express), each with varying costs, which can be reflected in the shipping rates you set.

Packaging materials
Consider the cost of packaging materials, such as boxes, bubble wrap, and tape, when calculating shipping rates.
Remember, offering free shipping or flat rates can entice customers and simplify your shipping process.
Managing Shopify Shipping

Managing your shipping process efficiently not only ensures timely deliveries but also helps you stay organized. Here are some tips to help you effectively manage your Shopify shipping:
1. Print shipping labels
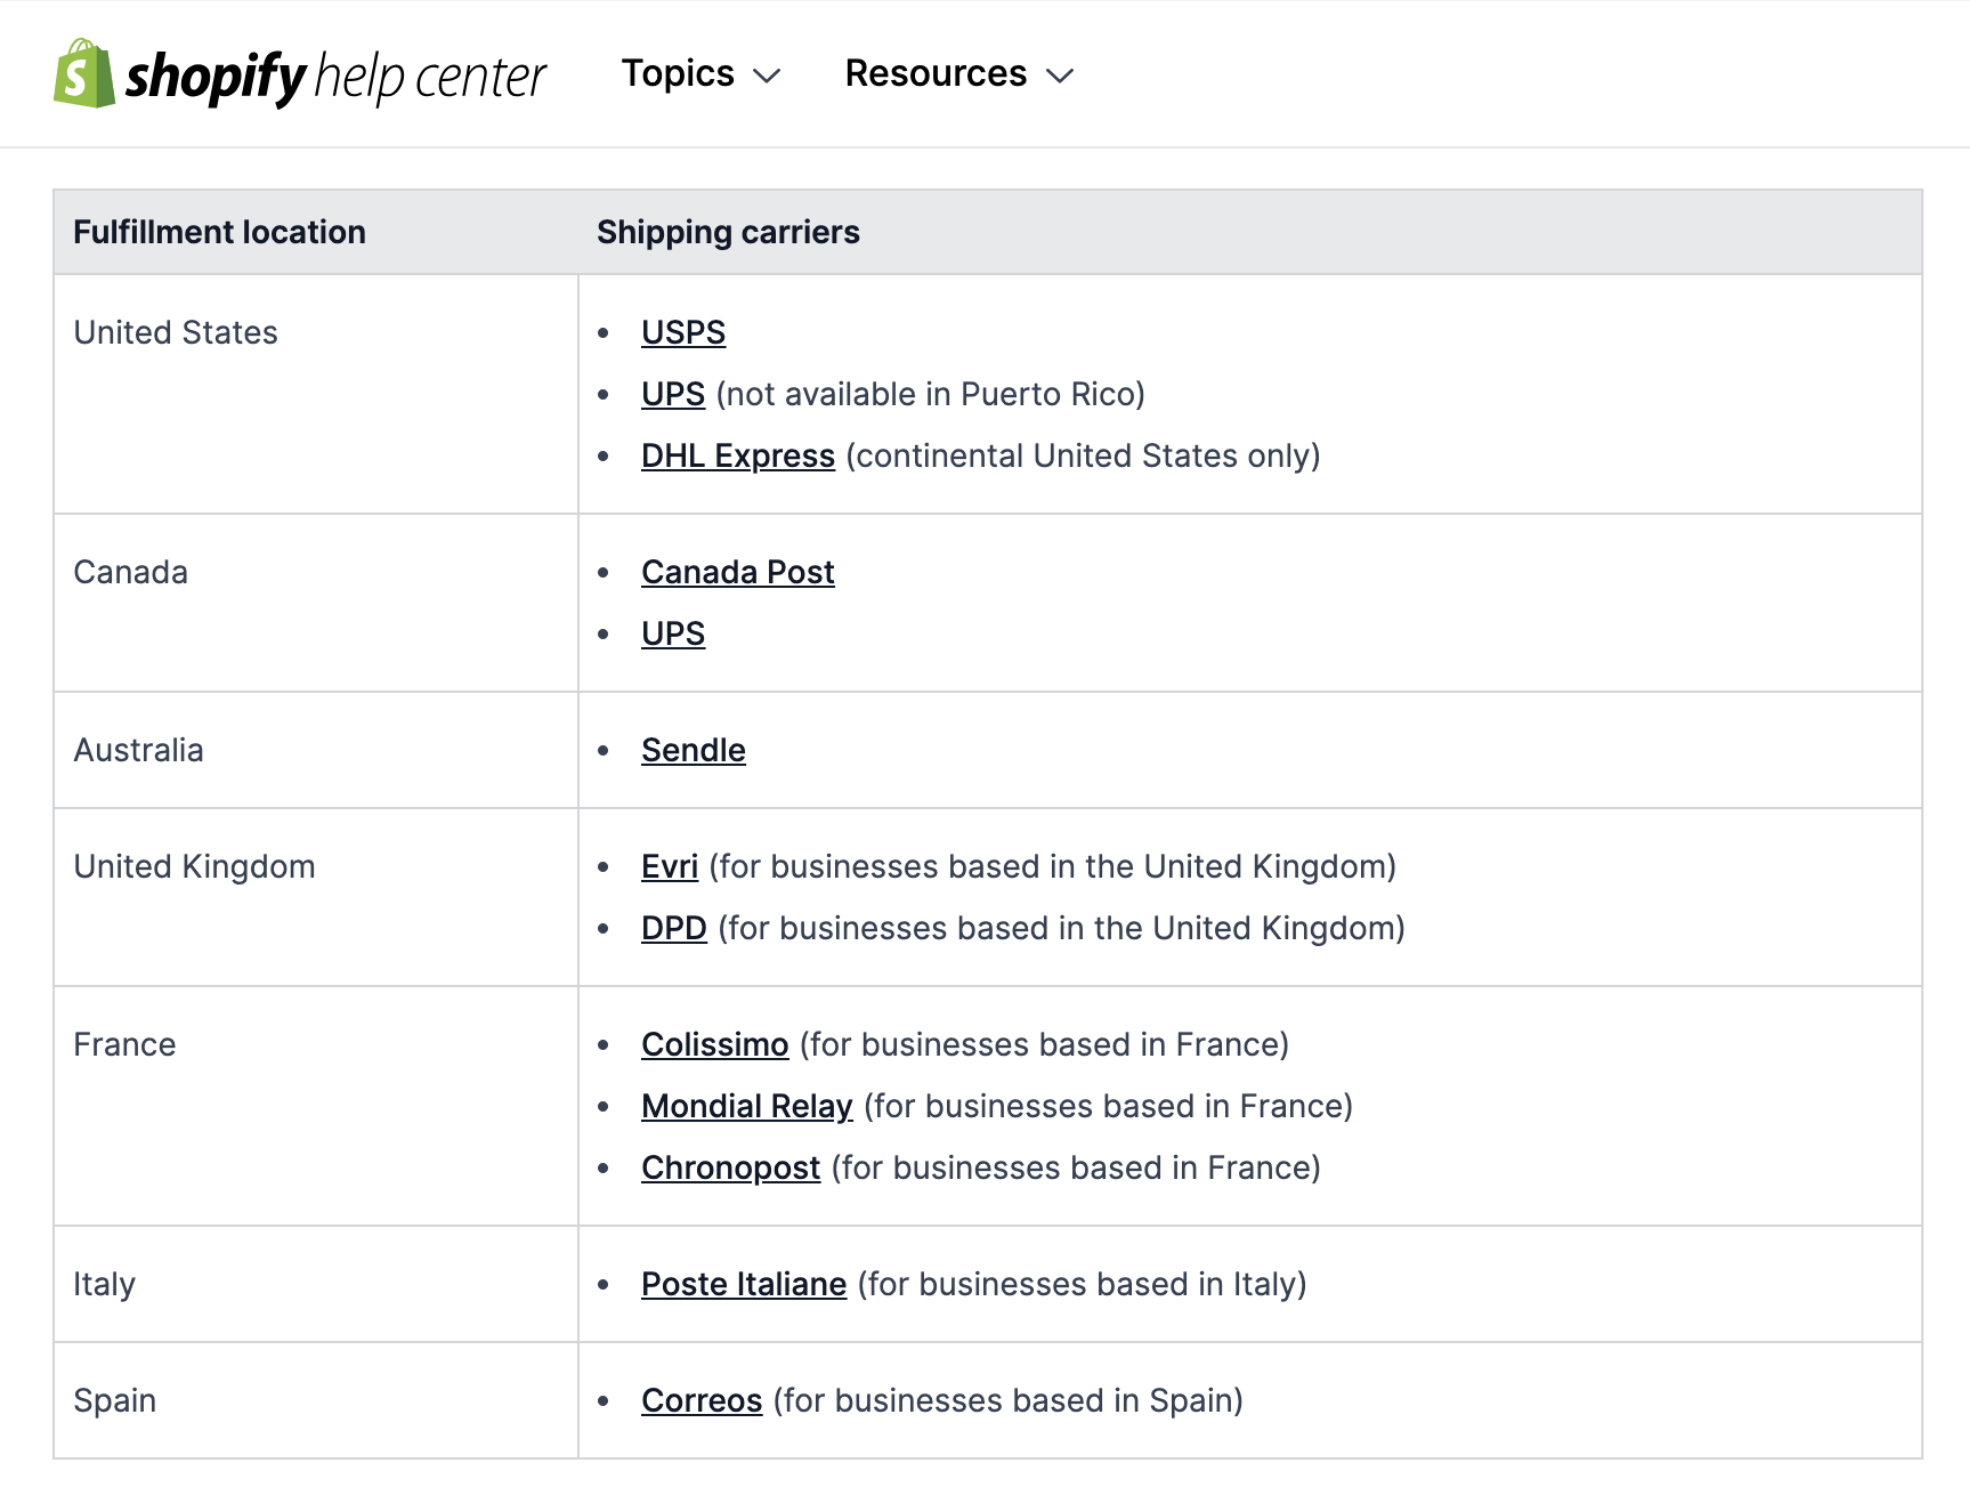
Printing shipping labels directly from your Shopify admin panel can save you time and effort. Simply purchase and print shipping labels through Shopify's integration with popular carriers, such as USPS, UPS, and FedEx. This streamlines the fulfillment process and allows you to track packages easily.
2. Fulfill orders with ease
Once an order is received, it's crucial to ensure timely fulfillment. Shopify offers a straightforward fulfillment process to help you manage orders efficiently:
- From your Shopify admin panel, go to "Orders" and select the order you want to fulfill.
- Check the shipping address and verify any special instructions from the customer.
- Select the appropriate shipping method and generate a shipping label.
- Package the order securely, affix the shipping label, and schedule a pickup or drop it off at the designated carrier location.
3. Set up order tracking
Providing order tracking information not only helps customers stay informed but also reduces inquiries about shipment status. Shopify provides an easy way to enable order tracking:
- Go to "Settings" and select "Checkout" from the left-hand menu.
- Scroll down to the Order processing section and check the "Show the 'Track my order' page" box.
- Customize the order tracking page with relevant information, such as carrier tracking numbers and estimated delivery dates.
4. Automate Shipping Notifications
Keeping your customers updated about their order status is essential for a positive shopping experience. Shopify allows you to automate shipping notifications, ensuring that customers receive timely updates:
- From your Shopify admin panel, go to "Settings" and select "Notifications."
- Customize the shipping confirmation email template to include relevant tracking information, estimated delivery dates, and contact details for customer support.
- Personalize the email with friendly and informative messages, making customers feel valued and informed about their order's progress.
5. Monitor Shipping Costs and Carrier Performance
Regularly monitoring your shipping costs and carrier performance is crucial to ensure your shipping strategy remains cost-effective and high-quality. Shopify provides analytics tools that allow you to track shipping expenses and carrier performance:
- Go to your Shopify admin panel and select "Analytics" from the left-hand menu.
- Choose the "Shipping" section to access detailed reports on shipping costs.
- Analyze carrier performance metrics, such as delivery times, to identify any areas for improvement or potential issues with specific carriers.
FAQs about Shopify Shipping
Q: Can I offer free shipping to my customers?
A: Yes, Shopify allows you to offer free shipping either as a promotional offer or a permanent option. You can set it up by adjusting your shipping rates and specifying "free" for specific regions or products.
Q: Can I ship internationally with Shopify?
A: Absolutely! Shopify enables you to set up shipping zones and rates for international destinations. Just make sure to consider factors like customs duties and restrictions when setting up international shipping.
Q: Can Shopify calculate real-time shipping rates?
A: Yes, Shopify can integrate with various shipping carriers to provide real-time shipping rates based on package weight, dimensions, and destination. This reduces the manual effort required to calculate rates.
How to Set Up and Manage Shopify Shipping Conclusion
As explained, efficiently setting up and managing your Shopify shipping process is crucial for the success of your online business. By following the steps outlined in this comprehensive guide, you can ensure a smooth and seamless shipping experience for both you and your customers.
Remember to regularly review and optimize your shipping strategy to enhance customer satisfaction and reduce costs.
Good luck in your ecom journey and be sure to check out more on growing your Shopify brand!
Data Accuracy and Source
First, rest assured that Sirge’s data is accurate. However, the way we track and attribute conversions differs from ad platforms:
- Sirge Attribution: We track a user’s journey from the initial click on an ad all the way to the purchase, giving you a full picture of what drives sales.
- Ad Platform Attribution: Ad platforms often attribute a sale to an ad if there was a click and a later purchase, even if the purchase wasn't directly influenced by that click. This can lead to over-attribution.
Where Does Sirge's Data Come From?
Sirge collects data directly from your website interactions and integrates it with data from your ad platforms. Here’s how:
- Website Interactions: We track user behavior on your site from the first ad click to the final purchase.
- Ad Platform Data: We pull in data from your ad platforms to understand ad interactions, then combine it with our tracking for complete attribution insights.
The Impact of When You Set Up Sirge
Another reason for discrepancies is the timing of your Sirge setup:
- No Retroactive Data: Sirge does not track data from before you set up tracking. If you start using Sirge after running ads, past interactions won’t be captured, which can initially cause data differences.


